A blender is an electric appliance known for its plastic or glass container with motorized blades used in the kitchen to mix, liquify, crush, emulsify, and puree ingredients. However, with different speeds, a blender can be used to:
- Make smoothies
- Grind meat
- Whip up sauces
- Knead pizza dough
More than 90% of households own a blender with models differing in size, material, and speed. The average blender has a 64 ounces capacity but compact or personal blenders will have jugs that can hold up to 24 ounces. On the other hand, commercial blenders will have jugs that have 114 ounces capacity. This means that blenders have a capacity ranging from 2 cups to 16 cups.
The blender will use 300 watts to 1500 watts depending on how powerful the appliance’s motor is and its size. An average blender uses 0.4kWh per hour which costs $0.048. Personal blenders can cost as little as $20 and offer the most basic functions while commercial blenders are more high-end and can offer up to 10 different speed settings as well as better quality. However, high-end blenders can cost up to $600.
You can use a blender to make flavored pudding or homemade almond, hazelnut, or macadamia nut butter. This appliance can also be used to chop up compost or make powdered sugar at home. Other uses of a blender include:
1. Vegetable Rice
A blender can be used to make vegetable rice. One of the best vegetables for rice is cauliflower. Thoroughly wash and dry a head of cauliflower. Cut off the leaves and chop up the cauliflower into florets. With the stems on, add your cauliflower into the blender and add enough water to cover the florets. Using the Pulse button, blend your cauliflower before pouring it out into a strainer.
To cook the cauliflower rice, heat oil in a medium-sized skillet. Chop onions and garlic and saute in the heated pan. Add cauliflower rice and combine with aromatics. Cover the pan with a lid and cook for 5 minutes to 8 minutes. Stir occasionally. Season with salt and pepper then serve.
2. Smoothies
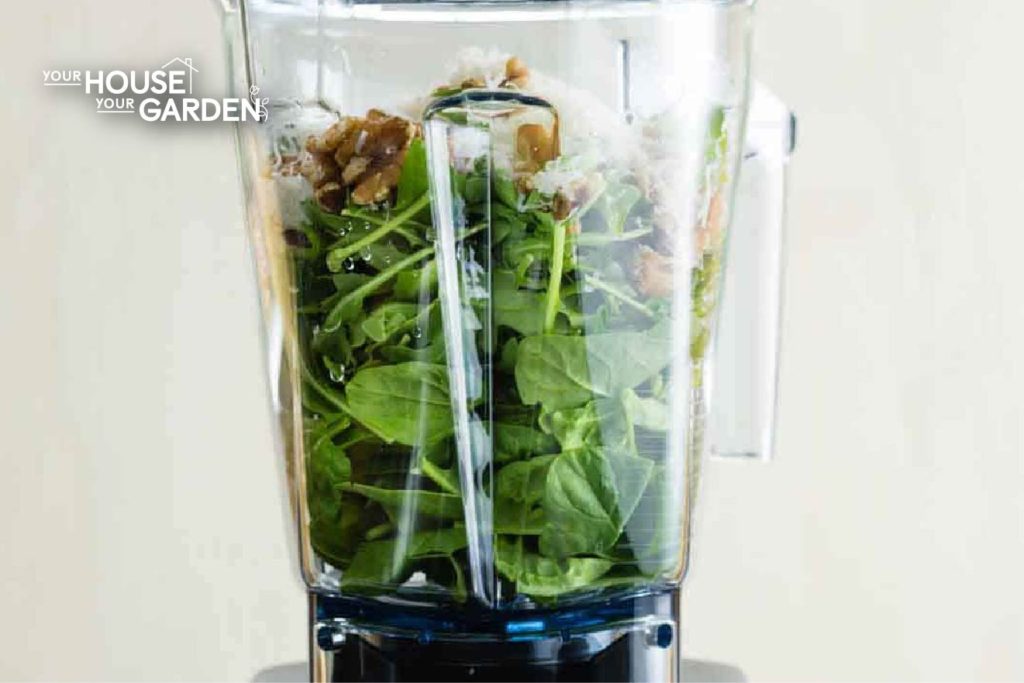
An alternative way to use a blender is to make smoothies with it. Add preferred milk, greens, frozen fruit, and vegetables into the blender. Top off with mix-ins like protein powder, chia seeds, and turmeric. Use the lowest speed or the Pulse button to blend the ingredients into small chunks before using the highest speed until your smoothie is silky. Pour into glasses and serve.
3. Nut Butter
Another way to use a blender is to make homemade nut butter with the appliance. Add dry roasted peanuts, hazelnuts, almonds, or macadamias into the blender. Use the lowest speed for 2 minutes to 3 minutes to break down the nuts. Use medium speed until the nut butter has a creamy consistency. Season with salt slowly, about ¼ teaspoon every 20 seconds to 30 seconds. Transfer to a jar and chill for at least 8 hours for a thick consistency.
4. Ground Meat
A blender also doubles as a meat grinder. Take meat out off the freezer and cut it up into 1-inch cubes. If you are going to grind meat in batches, keep the cubed meat in a bowl full of ice so that it stays below 40°F (4.4°C) and does not harbor harmful bacteria. Place meat cubes into the blender and use the Chop setting and run the appliance for 20 seconds to 30 seconds. Scrape down the sides and continue to “chop” the meat until it is the desired consistency.
5. Sauces and Dip
Also, sauces and dip can be made in the blender. To make tomato sauce, remove stems from tomatoes and cut into chunks. Peel garlic cloves and onions and dice. Transfer tomatoes, onions, and garlic into the blender and blend until the mixture is smooth. Pour tomato sauce into a large pot and bring to a simmer on Medium-high heat. Reduce the heat to Low and add olive oil, salt, sugar, and oregano. Let the sauce simmer for 1 hour to 1 hour and 30 minutes until it has a thick consistency.
6. Powdered Sugar
A blender can be used to make powdered sugar at home. Pour 2 cups of white sugar and 2 tablespoons of cornflour or cornstarch into the blender. Let the blender run for 4 minutes to 5 minutes before scraping down the sides of the blender. If the powdered sugar is already fine enough for you, transfer to an airtight container. If not, blend for another 2 minutes to 3 minutes.
7. Flour
Another way to use a blender is to make flour in it. To make gluten-free flour, add 4 cups of oat into the blender. Blend the oats on High for 2 minutes. Scrape down the sides and blend for another 2 minutes for a fine texture. Transfer oat flour into an airtight container and store in the pantry for 3 months. You can also store the oat flour in the freezer for 5 months to 6 months.
8. Batter
A blender can be used to mix batter. To make pancake batter, add your eggs, milk, and oil to the blender first. It is best to add liquids first for any batter you will make in the blender. Then, add flour, baking powder, salt, and sugar to the blender. Cover your appliance with the lid and blend the ingredients on High for 1 minute. Chill your batter in the fridge or start pouring batter into a heated pan to fry up pancakes.
9. Frozen Yogurt
The blender can alternatively be a frozen yogurt machine. Add 1 cup of full-fat yogurt and frozen berries of choice into the blender. Add sweetener of choice as well. If your blender has the Frozen Desert program, let the blender run one cycle. If your blender does not have this setting, blend the ingredients on the lowest setting and gradually increase the speed until you are blending the frozen yogurt on the highest setting. Blend ingredients for 45 seconds to 60 seconds or until smooth. Scoop out onto bowls and serve.
10. Omelets
Also, omelets can be made in the blender. Crack 6 eggs into a bowl and pour eggs into the blender. Blend the eggs on High for 1 minute to 1 minute and 30 seconds. Heat up a pan on Medium heat and add butter into it. Swirl the butter around to coat the bottom of the pan before pouring eggs into the pan. Cook for 2 minute to 3 minutes before turning down the heat to Low. Grate about ¼ cup of cheddar cheese onto the surface of the omelete and add spinach as well. Cook until the cheese melts and the spinach has wilted.
11. Cocktails
A blender can be an alternative to using a cocktail shaker. To make piña coladas, add white rum, coconut cream, pineapple juice, frozen pineapple chunks, and ice into the blender. Blend on high for 1 minute to 1 minute and 30 seconds. Pour into glasses and top off with golden run and pineapple leaves or slices as garnish.
12. Falafels
Alternatively, falafels can be made using the blender. Start by lining a baking sheet with parchment paper. Then in a large pot, heat vegetable oil on Medium-high heat. To make the falafels, add shallots, parsley, and garlic into the blender and pulse until it looks “chopped.” Add chickpeas or garbanzo beans, coriander, cumin, salt, pepper, flour, and olive oil. Pulse 15 to 20 times and scrape the sides of the blender down every 5 pulses or so. Transfer falafel mixture into a large bowl.
Scoop falafel mixture into your hands. Each ball should be around 2 tablespoons. Gently roll into balls and place onto a baking sheet. Fry falafel balls in the heated oil for 2 minutes to 4 minutes. Drain on a paper-towel lined platter and garnish with parsley.
13. Soup
Another meal to make using the blender is soup. To make roasted butternut squash soup, preheat your oven to 425°F (218°C) and like a baking sheet with parchment paper. Place your halved butternut squash on a baking sheet and drizzle each half with ½ teaspoon of olive oil. Sprinkle the butternut squash with salt and pepper. Turn the squash halves face down and roast for 40 minutes to 50 minutes. Let the squash cool for 10 minutes afterwards.
In a large pot, add 1 tablespoon of olive oil and heat on Medium heat. Add shallot and 1 tablespoon of salt into the olive oil and cook for 3 minutes to 4 minutes. Add garlic and cook for another minute before transferring ingredients to the blender. Using a large spoon, scoop butternut squash flesh into the blender adding sweetener of choice, black pepper, and nutmeg as well. Add 3 cups of vegetable broth before securing the lid and blending ingredients on High. If the blender has a Soup program, let it run one cycle. Pour soup into bowls or heat up in pot for steaming soup.
14. Pudding
Also, the blender can be used to make chocolate pudding. To make non-dairy chocolate pudding, add almond milk, frozen avocado, frozen banana chunks, cocoa powder, pitted dates, sea salt, and vanilla into the blender with 3 to 4 ice cubes. Process until smooth then pour into bowls.
15. Plant-based Milk
A blender can be used to make plant-based milk. To make a non-dairy milk like almond milk, almonds should be soaked in cool water overnight or in hot water for 1 hour to 2 hours. Add soaked almonds, filtered water, sea salt, and sweetener of choice into the blender and process at High speed for 1 minute to 2 minutes. Strain the mixture using a nut milk bag or a cheesecloth. Squeeze out all of the milk and transfer to a jar or bottle and keep cool in the refrigerator. Homemade almond milk will last 4 days to 5 days when refrigerated.
16. Body Scrubs
An alternative way to use the blender is to make body scrubs at home with it. Simply add sugar, oil, and coffee grounds into the blender and pulse 5 times to 10 times. Transfer to a bowl and apply on skin. Scrub then rinse off the mixture.
17. Compost
Compost can be blended to speed up the decomposition process. Add vegetable scraps, fruit peels, grains, coffee grounds, and egg shells into the blender. Fill up the blender cup ¼ of the way with water. Process on High speed until smooth. Pour compost out onto garden soil.
18. Pizza
Also, a blender can be used to knead pizza dough. To make a pizza using the blender, preheat the oven to 350°F (176°C.) Add milk, butter, eggs, sugar, salt, and pepper into the blender process while slowly adding in flour. When the batter is a smooth mixture, pour it into a greased pizza pan. Bake in the oven for 10 minutes. Remove the pizza from the oven, spread a thin layer of tomato sauce on top before grating cheese over the pizza. Add other toppings like pepperoni or vegetables. Bake for another 10 minutes to 15 minutes and top with oregano leaves before serving.

Common Mistakes for Blender Usage
When learning how to use a blender for the use cases above, avoid the following common mistakes to efficiently use the kitchen appliance:
- Investing in a low-quality appliance. If you plan to use a blender regularly, investing in a high-quality one can help you save money in the long run. With a powerful motor and sharp blades, quality blenders will not need to be replaced due to overheating or dull blades.
- Adding all ingredients at once. To blend optimally, ingredients should be placed in the blender with liquids first followed by powders, solid, then frozen ingredients.
- Overfilling the blender cup. Filling up the blender cup to the brim can cause the blender to overheat or the lid to fly off. Stay below the capacity line and blend in batches if you need to.
- Speeding up too quickly. Gradually increase the appliance’s speed when the recipe calls for an increase of speed to reduce the wear and tear of the blender’s motor. Ingredients will also blend better this way.
- Adding whole ingredients. While powerful blenders can take on whole ingredients, it is recommended to chop up or break up ingredients before processing. Not only will ingredients blend smoother, but the blender’s motor will not have any reason to work harder than it should.
- Not securing the lid. If the lid is not put on tightly, it will fly off with the ingredients following afterward.
- Processing ingredients without taking breaks. Processing ingredients in the blender for long periods of time without any breaks can cause the motor to overheat. If you are not pulsing ingredients, let them process for 1 minute or 2 minutes at a time. Take a break then process some more.
- Adding ingredients that are too hot. When ingredients are piping hot, they can cause the blender lid to fly off because of the accumulating steam. Fill up blenders halfway and remove the lid when you are taking breaks so that steam can escape.
- Cleaning the blender incorrectly. To clean your blender, fill the blender cup ⅔ of the way with water and add 3 drops to 5 drops of dishwashing liquid. Let the blender process for 1 minute to 2 minutes and rinse. Use a sponge to scrub off any excess food.
- Leaving the blender plugged in at all times. Unplug the blender after every use to minimize the chances of an injury or damage to the machine.
- Not checking all of the parts before use. Making sure that all of the parts are secure and attached correctly will reduce the likelihood of damage to your blender.
Avoid these common appliance errors to take care of your blender and use it properly for the use cases above.
History of Usage of Blenders
So what is a blender and where did it come from? The owner of Wisconsin-based Stevens Electric Company, Stephen Poplawski, invented the blender in 1922. Looking for a way to mix drinks in a similar way that milkshakes and malts were at the time, he came up with attaching a spinning blade to the bottom or a container that was connected to a motor. He received a patent for this machine that could turn fruits and vegetables into a liquid in 1932.
In 1933, Fred Waring, an architecture and engineering student from Penn State, invested in Fred Osius’ design called the Waring blender. However, even after 6 months of re-designing the invention, it had technical difficulties. Waring left Osius and redesigned the blender himself and introduced the Waring Blender to the market in 1937. In the 1950s, the blender became used in labs and hospitals as a tool for scientific research.
Does the Use Cases of a Blender Change Based on Type
Yes, the use cases of a blender change based on the type of blender you have. A countertop blender has a 4 cup to 8 cup capacity and has different speeds for chopping, mixing, and blending. There are also immersion blenders, which are also called stick or hand blenders. This type of blender allows homeowners to mix ingredients directly in a pot, bowl, or cup because it is compact. An immersion blender will have 2 speeds to 9 speeds and can be used for small or big batches of food.
Also, there are personal blenders which may not be as powerful as countertop or immersion blenders but are perfect for single-serve use. These single-serve blenders have a 1 cup to 3 cup capacity and will typically be more affordable than immersion or countertop blenders. Then there are high-performance blenders which have powerful motors for even the toughest ingredients.
What Blender is Best for Making Smoothies
The best blender for making smoothies is a high-performance blender. These blenders can be used for big batches of smoothies and will give you smooth and silky smoothies no matter how hard the frozen fruits and vegetables for the smoothies are.

Which Has More Use Cases: A Juicer or a Blender?
Comparing the two, blender vs. juicer, a blender has more use cases. While both kitchen appliances can be used to make dips, cocktails, nut butter, soup, and sauce, a blender can be used to mix, grind, knead, and turn ingredients into fine powders. Compared to a juicer, a blender can be used for more.
Other Kitchen Tools with Various Use Cases Similar to Blender
Other kitchen tools with various use cases similar to a blender include:
- Chopper: A chopper is a single-blade kitchen tool that is used to mix, chop, or puree small batches of ingredients.
- Coffee Grinder: This appliance is used to grind coffee into coarse or fine grounds depending on the brewing style of a homeowner.
- Food Processor: A food processor is used to blend, chop, cut, knead, and combine wet and dry ingredients with different speeds.
- Mixer: A mixer uses a bowl and whisk attachments to combine ingredients well. This appliance runs on electricity and has different mixing speeds and attachments.
- Whisk: This kitchen tool incorporates air or blends ingredients into a homogenous mixture with its narrow handle and attached wire loops.
While these kitchen tools have similar functions to a blender, they have use cases unique to themselves. Learn more about these 5 kitchen tools and their 5 other uses here.

